Screenies
Screenies is SonicDE's application for capturing and editing screenshots and recording the screen. It can capture the entire desktop, a single monitor, the active window, the window under the mouse, or a rectangular region of the screen. The images can then be annotated, printed, sent to other applications, or quickly saved as they are.
Please report problems and feature requests in the Screenies issue tracker.
Starting Screenies
- Find Screenies in the application launcher.
- Press the Print Screen key (often labeled PrtSc or PrtScn) or Meta+Shift+S.
- Use one of the shortcuts that take a screenshot and save it in your default folder without showing the main window:
- Meta+Print Screen captures the active window.
- Meta+Ctrl+Print Screen captures the window under the mouse.
- Shift+Print Screen captures your entire desktop, on all monitors.
- Meta+Shift+Print Screen captures a rectangular region.
- Run
sonic-screeniesfrom the command line. Its options include a background mode for scripting screenshots without showing the window or requiring user interaction. See the full list withsonic-screenies --help.
You can change these shortcuts on the Shortcuts page of the settings. Shortcuts also exist for capturing the current monitor and for starting Screenies without taking a screenshot, but they're unassigned by default.
Taking a screenshot
By default, starting Screenies shows the rectangular region selector. The General settings can make it capture the full screen, repeat the last capture mode, or not capture anything at first.
Without a capture, Screenies shows its main window, where you choose how to take a screenshot:
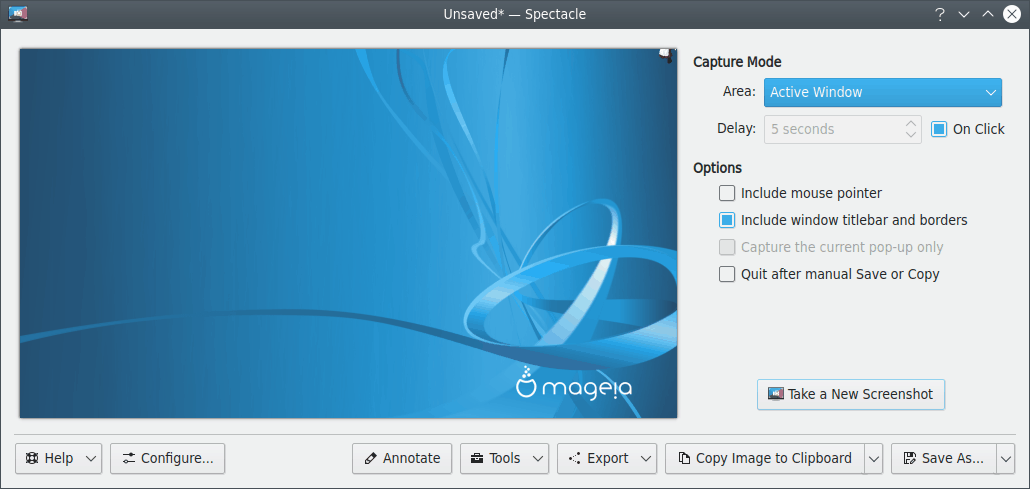
- Rectangular Region: Select a rectangular region of your desktop with your mouse. It may spread across several screens. See Selecting a region.
- All Screens: Captures your entire desktop across all outputs, including all monitors and projectors.
- All Screens (Scaled to same size): Captures all screens as above, scaling them to the same size.
- Full Screen: The mode shown instead of All Screens when you have one screen.
- Current Screen: Captures the output that contains the mouse pointer.
- Active Window: Captures the window that has focus. Use a delay with this mode to give yourself time to select and activate a window.
- Window Under Cursor: Captures the window under the mouse. If the cursor is on top of a popup menu, Screenies tries to capture the menu as well as its parent window. If it can't find the parent window, it captures only the menu. To force that, enable Capture the current pop-up only.
Options
The options for a screenshot are in the main window and in the Options menu.
- Include mouse pointer: Includes an image of the mouse pointer.
- Include window titlebar and borders: Includes the window's decoration when capturing a single window. Otherwise you get only the window contents.
- Include window shadow: Includes the window's shadow when capturing a single window.
- Capture the current pop-up only: With Window Under Cursor, captures only the popup menu under the cursor, without its parent window.
- Quit after manual Save or Copy: Quits Screenies after you save or copy. A copied screenshot is only retained if you're running a clipboard manager that accepts images. The Clipboard can do this.
- Capture on click: Hides the window and waits for a mouse click before capturing.
- Delay: Sets the delay before capturing, from No Delay upward in seconds.
During a delay, Screenies shows the remaining time in its window title and a progress bar on its Task Manager entry. If you bring the window back, you can cancel the countdown.
Selecting a region
In Rectangular Region mode, draw a rectangle on the screen, which can be moved and resized. To capture it, double-click or press Enter. Press Esc to cancel.
- The arrow keys move the rectangle.
- Holding Shift while pressing the arrow keys moves it slowly, for fine-tuning.
- Holding Alt while pressing the arrow keys adjusts its size.
Working with a screenshot
After capturing, Screenies shows the image with these actions:
- Save (Ctrl+S): Saves to the default location with the default file name.
- Save As… (Ctrl+Shift+S): Opens the standard save dialog, where you choose the file name, folder and format.
- Copy (Ctrl+C): Copies the image to the clipboard. Copy Location copies the path of the saved file instead.
- Export: Opens the image in another application, opens the default screenshots folder, shares the image, or extracts text.
- Print (Ctrl+P): Opens the print dialog.
- Edit…: Opens the annotation tools.
- New Screenshot (Ctrl+N): Discards the current screenshot and takes another.
After saving, Screenies shows a message with a link to the file, and offers Open Containing Folder.
Annotating
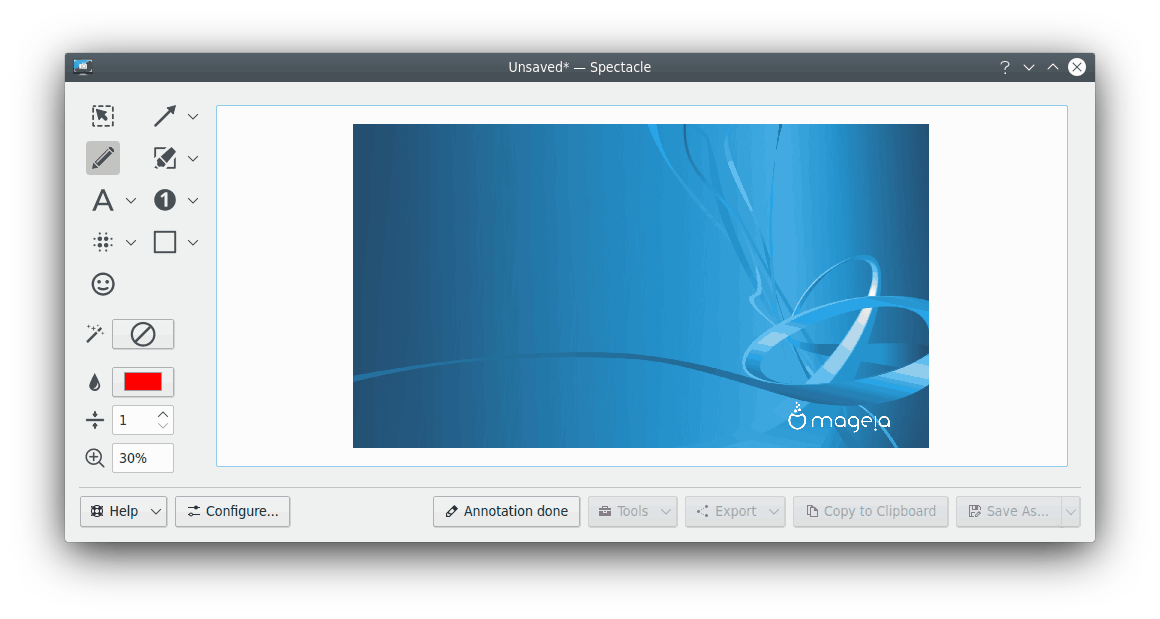
The annotation tools are Select, Crop, Freehand, Highlighter, Line, Arrow, Rectangle, Ellipse, Pixelate, Blur, Text and Number. Depending on the tool, the options toolbar sets the stroke width and color, fill color, strength of the effect, font, font color, number, and shadow.
With Freehand, holding Shift snaps to straight lines. With Line, it snaps to 45 degree increments.
Undo and Redo work with their usual shortcuts.
Extracting text
Export > Extract Text recognizes text in the image with Tesseract OCR, in the languages set in the General settings. Language data needs to be installed for each language you want to use.
Drag and drop
A captured image can be dragged to another application or document. If the application can handle images, a copy of the full image is inserted.
If you drag a screenshot into a file manager window, a dialog lets you edit the file name and select the image format, and the file is put in that folder.
If you drag the screenshot to a text box, the path to a temporarily saved file is inserted. This is useful for example to upload a screenshot through web forms. It works with all clients that don't pick up the image data but only look for a URL.
Recording the screen
The main window's Recording section records the Full Screen, a Window, or a Rectangular Region. Its options include the mouse pointer, the microphone and system audio. The shortcuts are:
- Meta+Alt+R starts and stops recording the screen.
- Meta+Ctrl+R starts and stops recording a window.
- Recording a region has its own shortcut on the Shortcuts page.
Recording needs an encoder for one of the supported formats, WebM with VP9 or MP4 with H.264. Without one, the recording options aren't available.
Settings
Open them with Configure Screenies… (Ctrl+Shift+,).
General
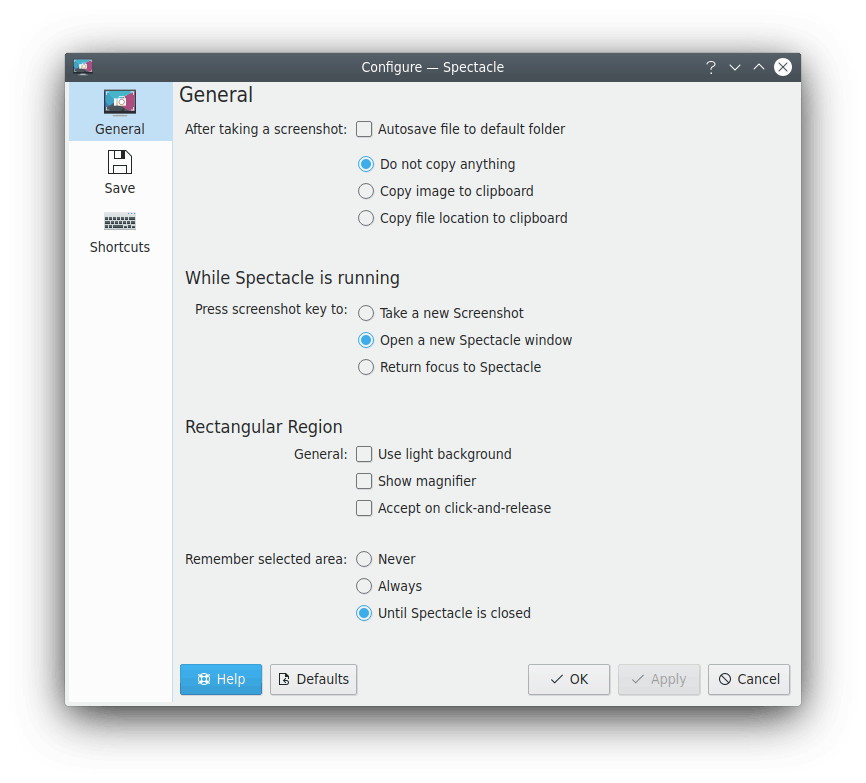
- When launching Screenies: Choose between taking a rectangular screenshot (the default), taking a full screen screenshot, using the last-used capture mode, or not taking a screenshot automatically.
- After taking a screenshot: Save file to default folder saves automatically. Then choose between Do not copy anything, Copy image to clipboard and Copy file location to clipboard. You must be running a clipboard manager to keep the path or image in the clipboard after Screenies quits.
- Press screenshot key to: When a screenshot shortcut is pressed while Screenies is running, choose between taking a new screenshot, opening a new Screenies window, and returning focus to the existing window.
- Use light background: Uses a light background color to mask the cropped-out area in the region selector. This may make dark cursors easier to see.
- Show magnifier: Shows a magnifier in the region selector: never, always, or while holding Shift (the default).
- Accept on click-and-release: Accepts the selected region as soon as the mouse button is released. When selecting a new region without a saved one available, clicking, dragging and releasing captures the region immediately. When a saved region is shown, it can be manipulated further, and accepting it requires Enter or a double click. Clicking and dragging outside of it captures the new region immediately.
- Remember selected area: Screenies remembers a selection until you close it, by default. You can also choose never or always.
- Languages for OCR: Chooses the languages for text extraction. Close after extraction closes Screenies after extracting text.
Image Saving
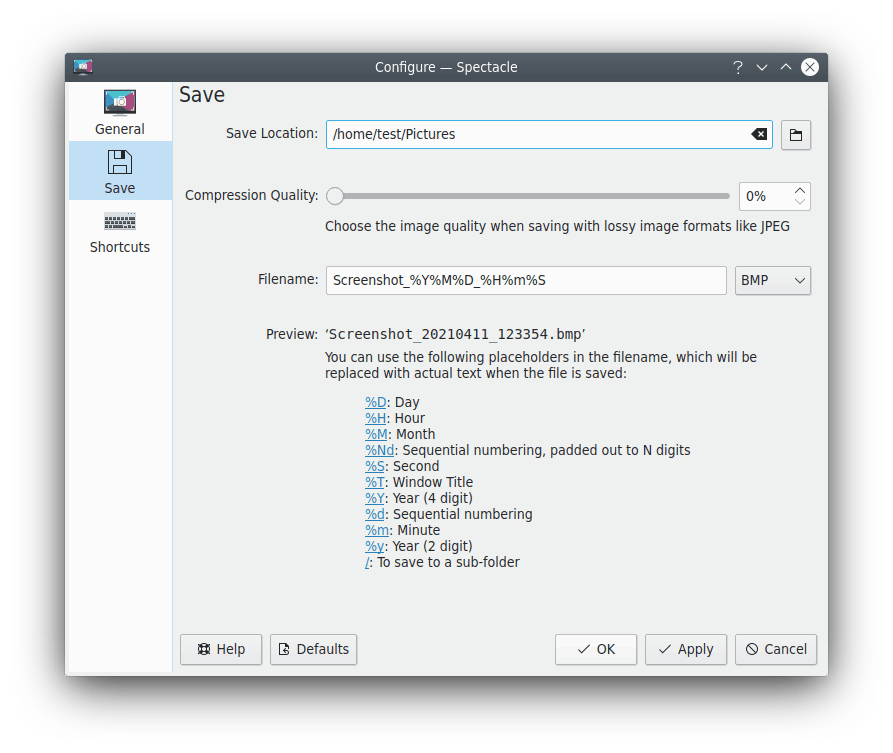
- Save Location: The folder used when you press Save. By default, it's your Pictures folder.
- Compression Quality: The image quality when saving with lossy image formats like JPEG. Higher values give better quality but increase the file size.
- Filename: The default file name, and beside it the default image format, PNG unless you change it.
The default file name is Screenshot_<yyyy><MM><dd>_<HH><mm><ss>. These placeholders are replaced when the file is saved, and you can click one in the dialog to insert it:
<yyyy>,<yy>: Year, 4 or 2 digits<MM>,<MMM>,<MMMM>: Month as a number, a short name or a long name<dd>: Day<HH>,<hh>: Hour, from 00 to 23 or from 01 to 12<mm>: Minute<ss>: Second<Ap>: AM/PM or am/pm, localized<tt>: Timezone offset<title>: Window title<#>: Sequential number
If a file with this name already exists, a serial number is appended. For example, if the file name is Screenshot and Screenshot.png already exists, the image is saved as Screenshot-1.png.
Video Saving
This page sets the save location, file name and format of recordings. The default file name is Screencast_<yyyy><MM><dd>_<HH><mm><ss>.
Shortcuts
This page changes the shortcuts for starting Screenies and capturing or recording different parts of your desktop.